Ingredients:
For the Cake:
- 1 cup (240 ml) cream cheese, softened
- 1/2 cup (120 ml) heavy cream
- 1/4 cup (60 ml) sour cream
- 1/2 cup (100 g) granulated erythritol or monk fruit sweetener (adjust to taste)
- 1/4 cup (30 g) coconut flour
- 4 large eggs, separated
- 1 tsp vanilla extract
- 1/2 tsp baking powder
- A pinch of salt
For the Cake Pan:
- 1 tbsp butter or non-stick cooking spray (for greasing)
Instructions:
- Preheat Oven:
- Preheat your oven to 320°F (160°C).
- Prepare the Pan:
- Grease a 7-inch (18 cm) round cake pan with butter or non-stick spray. Line the bottom with parchment paper and grease the parchment paper lightly.
- Melt Cream Cheese:
- In a medium bowl, use an electric mixer to beat the softened cream cheese until smooth.
- Mix Ingredients:
- Add the heavy cream, sour cream, and erythritol to the cream cheese. Beat until well combined and smooth.
- Mix in the vanilla extract and the egg yolks one at a time, making sure each is fully incorporated before adding the next.
- Add the coconut flour, baking powder, and salt. Mix until just combined.
- Beat Egg Whites:
- In a clean, dry bowl, use an electric mixer to beat the egg whites until stiff peaks form. This can take a few minutes.
- Fold in Egg Whites:
- Gently fold the beaten egg whites into the cream cheese mixture. Be careful not to deflate the egg whites; fold until the mixture is uniform.
- Pour Batter:
- Pour the batter into the prepared cake pan. Smooth the top with a spatula.
- Prepare Water Bath:
- Place the cake pan inside a larger baking dish. Fill the outer dish with hot water, about halfway up the sides of the cake pan. This water bath helps to create a gentle baking environment and prevents cracking.
- Bake:
- Bake in the preheated oven for 50-60 minutes, or until the cake is set and a toothpick inserted into the center comes out clean. The top should be lightly golden brown.
- Cool:
- Turn off the oven and crack the oven door slightly. Let the cheesecake cool in the oven for about an hour to prevent sudden temperature changes that can cause cracking.
- Refrigerate:
- Remove the cheesecake from the oven and the water bath. Let it cool to room temperature, then refrigerate for at least 4 hours or overnight to fully set.
- Serve:
- Carefully remove the cheesecake from the pan and parchment paper. Slice and enjoy!
Tips:
- Ensure all ingredients are at room temperature for the best texture.
- Be gentle when folding in the egg whites to maintain the airy texture.
- Use a water bath to prevent cracks and ensure even baking.
Enjoy your light and fluffy keto Japanese cheesecake!
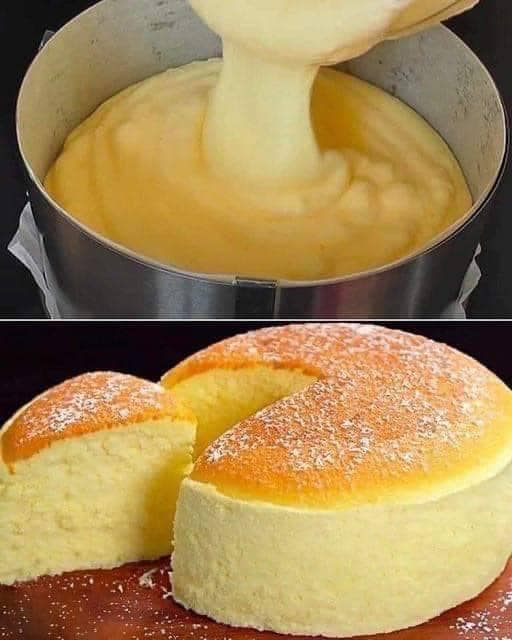
Keto Japanese cake
When it comes to indulgent desserts that align with a keto lifestyle, the keto Japanese cake stands out as a unique and delicious option. This cake, also known as a Japanese cotton cheesecake, is renowned for its light, airy texture and rich, creamy flavor. It's a dessert that combines the best of both worlds: the fluffiness of a soufflé and the decadence of a cheesecake. For those on a ketogenic diet, finding a way to enjoy such a treat without compromising their dietary goals can be challenging, but this recipe makes it possible.
The traditional Japanese cake is made with ingredients like sugar and flour, which are not keto-friendly. However, with a few smart substitutions, you can create a version that is low in carbohydrates yet still captures the essence of the classic dessert. Almond flour and a keto-approved sweetener replace the usual suspects, ensuring that you stay within your carb limits while enjoying a slice of heaven. The result is a cake that is just as satisfying and indulgent as the original but without the guilt.
One of the most appealing aspects of the keto Japanese cake is its versatility. It can be enjoyed plain or with a variety of keto-friendly toppings, such as fresh berries, a dusting of powdered erythritol, or a dollop of sugar-free whipped cream. This adaptability makes it a fantastic dessert for any occasion, whether you're hosting a dinner party, celebrating a special event, or simply treating yourself after a long day. The cake's elegant appearance and melt-in-your-mouth texture are sure to impress your guests and leave them asking for the recipe.
Creating this cake may seem daunting at first, especially if you're not familiar with the techniques used in Japanese baking. However, the process is simpler than it appears, and with a little patience and attention to detail, anyone can master it. The key lies in properly whipping and folding the egg whites, which give the cake its signature airy texture. By following the steps carefully and ensuring your ingredients are at the right temperature, you can achieve a perfect keto Japanese cake that rivals any bakery's version.
For those who are new to the keto lifestyle, this cake serves as a testament to the fact that you don't have to give up your favorite treats to stay on track. The keto diet can often seem restrictive, but recipes like this one demonstrate that there are countless ways to reinvent classic dishes in a low-carb, high-fat manner. Embracing creativity in the kitchen can lead to discovering new favorite recipes that fit seamlessly into your keto journey.
In conclusion, the keto Japanese cake is more than just a dessert; it's a delightful experience that brings together the best of Japanese culinary traditions and ketogenic principles. Its light, fluffy texture and rich, creamy flavor make it a standout choice for anyone looking to enjoy a sweet treat while maintaining their low-carb lifestyle. Whether you're a seasoned keto dieter or just beginning your journey, this cake is a must-try, offering a perfect balance of indulgence and nutritional mindfulness.


No comments:
Post a Comment